

Sound recording as of 2025
This section describes the most likely ways to make a high quality sound recording in the phonetics lab or in the field using 32-bit float technology. The other sections provide background on audio recording, some of which is less relevant now than it was several years earlier.
In the sound booth using the Zoom UAC-232 USB audio converter

The microphone’s XLR connector should be plugged into ‘s input 1, and there should be a USB cable connecting the UAC-232 to the computer. The headset microphone is designed to hook over the ears from behind, with the microphone ideally located about 2cm to the side of the corner of the mouth. The phantom power light for channel 1 should be lit (press it if it’s not). None of the other controls on the UAC-232 affect recording.
Log into the computer and run Audacity. If the microphone is in place and the door is closed, click the record button (with a red circle). Quickly make sure it says Mono, 44100 Hz and 32-bit float on the left side of where the audio track appears. Then talk, and click the stop button (black square) when you are done. Click File… Export… Export as WAV, and then choose a folder and filename. Your filename should end with _32bit.wav. Keep the encoding as 32-bit float and click Save. Click OK to skip adding metadata. You can exit Audacity now.
Run Praat. Click Open… Read from file… and then browse to the wav file you just saved in Audacity and click to open it. You can click View & Edit to inspect it. Now is a good time to trim off any extra sound at the start or end, especially if there was a loud noise. Ideally the loudest sound in the recording is your actual speech. In the Praat Objects window, make sure your sound is selected, and click the Modify button, then Scale peak… and make sure New absolute peak is 0.99, and click OK. Click Save… Save as WAV file, and choose a folder and filename, which could be the same as the first filename except without the _32bit part. This is a high-quality 16-bit sound file that you can use for analysis.
At this point, you can log in to Google Drive and upload your 16-bit sound file to your space, or you can open a CMD terminal and scp your 16-bit sound file to somewhere on the shared drive.
Using the Zoom F3 digital recorder
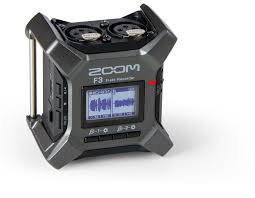
The Zoom F3 digital recorders have very minimal controls because they record audio in a format called 32-bit float, which effectively has over 1500 dB of dynamic range. You can use the buttons on the front to make the waveform appear smaller or larger and make the audio sound softer or louder on the headphones, but there is no actual gain control because it’s not necessary. Changing the waveform size doesn’t permanently change the recording. After making a recording and transferring it to a computer, you can adjust the level so that the loudest speech is up near +/- 1 in Praat and save it as a normal 16-bit wav file. There should not be any problems with clipping or with making very quiet recordings out of fear of clipping.
The settings you should pay attention to when using the device for the first time are setting the date and time and formatting the microSD card. These are described at the beginning of the quick start guide
Here are the settings you will want to set/check before you record:
Set the sample rate:
Menu button -> Recording -> Sample Rate -> 44.1kHz (then press check mark and press Menu button again)
Turn off channel 2 if not using two microphones:
Gear button under channel 2 (rightmost of four buttons) -> On/Off -> Off (then press check mark and press Menu button again)
Also, phantom power (+48V) should already be turned off by default and we want to keep it that way if using the Shure lavalier microphones with the AA battery. If you want to check it, it’s accessed via the Source option in the channel 1 (or 2) gear button menu, and the option you want it “Mic”. If you use a microphone that requires phantom power, choose “Mic (+48V)” instead.
Microphones
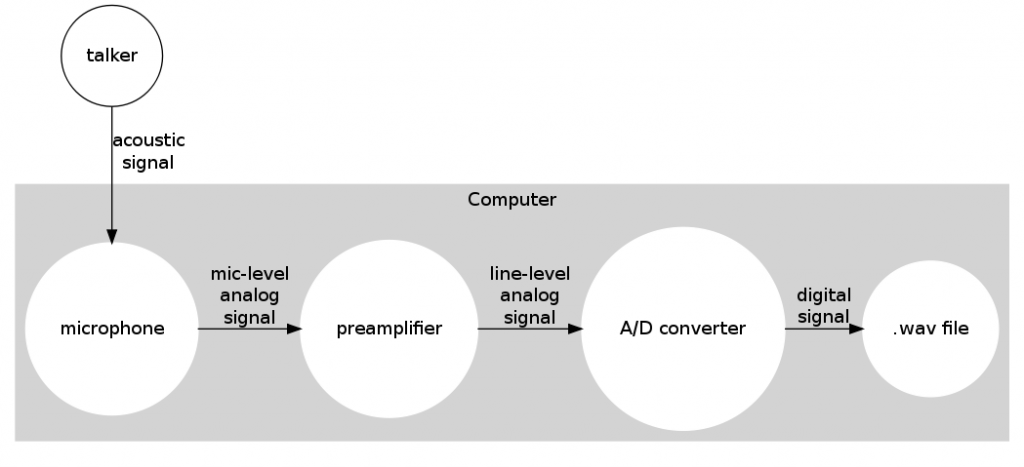
Any time you use microphone to make a digital audio recording, you are using a microphone to convert facts about air pressure into facts about an electrical signal, amplifying that signal, converting it from analog to digital, and storing it in some digital medium.
Steps for digital recordings:
- Microphone: Air pressure moves a diaphragm, generating an electrical signal. If it’s a condenser microphone, it will need to be connected to a phantom power source, such as a preamplifier.
- Preamplifier: raises the voltage of the microphone signal.
- A/D converter: converts the analog signal (an electrical current whose voltage fluctuates as a reflection of air pressure changes detected by a microphone) into a digital signal (ones and zeros that represent the amplitude of the analog signal at specific points in time). The digital audio can be stored on a disk.
The simplest way to record is to used the internal microphone on a computer(using Praat or Audacity programs), which contains all the necessary components. But any different combinations of equipment can be used to do this, and some of them provide much better results.
- Recording with a computer’s internal microphone

MICROPHONE PARAMETERS
- Dynamic vs. condenser: Condenser microphones are often more sensitive and smaller than dynamics, but they require a phantom power source, and they are more fragile
- Polar pattern: Some mics can be omnidirectional (picking up sound equally in all directions) or unidirectional (rejecting off-axis sounds). Unidirectional pickup patterns include cardioid, hypercardioid, and supercardioid. Figure-8/bi-directional is another option.
- Frequency response: Some mics are disproportionately sensitive to certain frequencies. Condenser microphones often have flatter frequency response than dynamics, which may enhance midrange and/or low frequences.
- Mount: microphones can be mounted directly on a microphone stand, or in a shock mount, or may be head-mounted. If recording ultrasound data, the instrument microphone will be clipped onto the ultrasound helmet.
- Windscreen: microphones may have a windscreen to reduce noise caused by rushing air (may be beneficial if recording outside).
OPTIONS YOU MIGHT SEE
- Low-frequency rolloff: Some mics have a switch that causes low frequences to be attenuated
- Pad: Some mics and preamps have an option to decrease the sound level by a certain number of decibels.
- Polar pattern: Some mics are switchable between different polar patterns.
CHOOSING THE RIGHT MICROPHONE
A head-mounted microphone is often the best choice for recording speech, because the microphone can be held at a fixed distance from the mouth (so that amplitude does not vary when the talker moves). A head-mounted microphone should be placed so that the microphone is 2-3 centimeters from the corner of the mouth, not in front of the mouth.
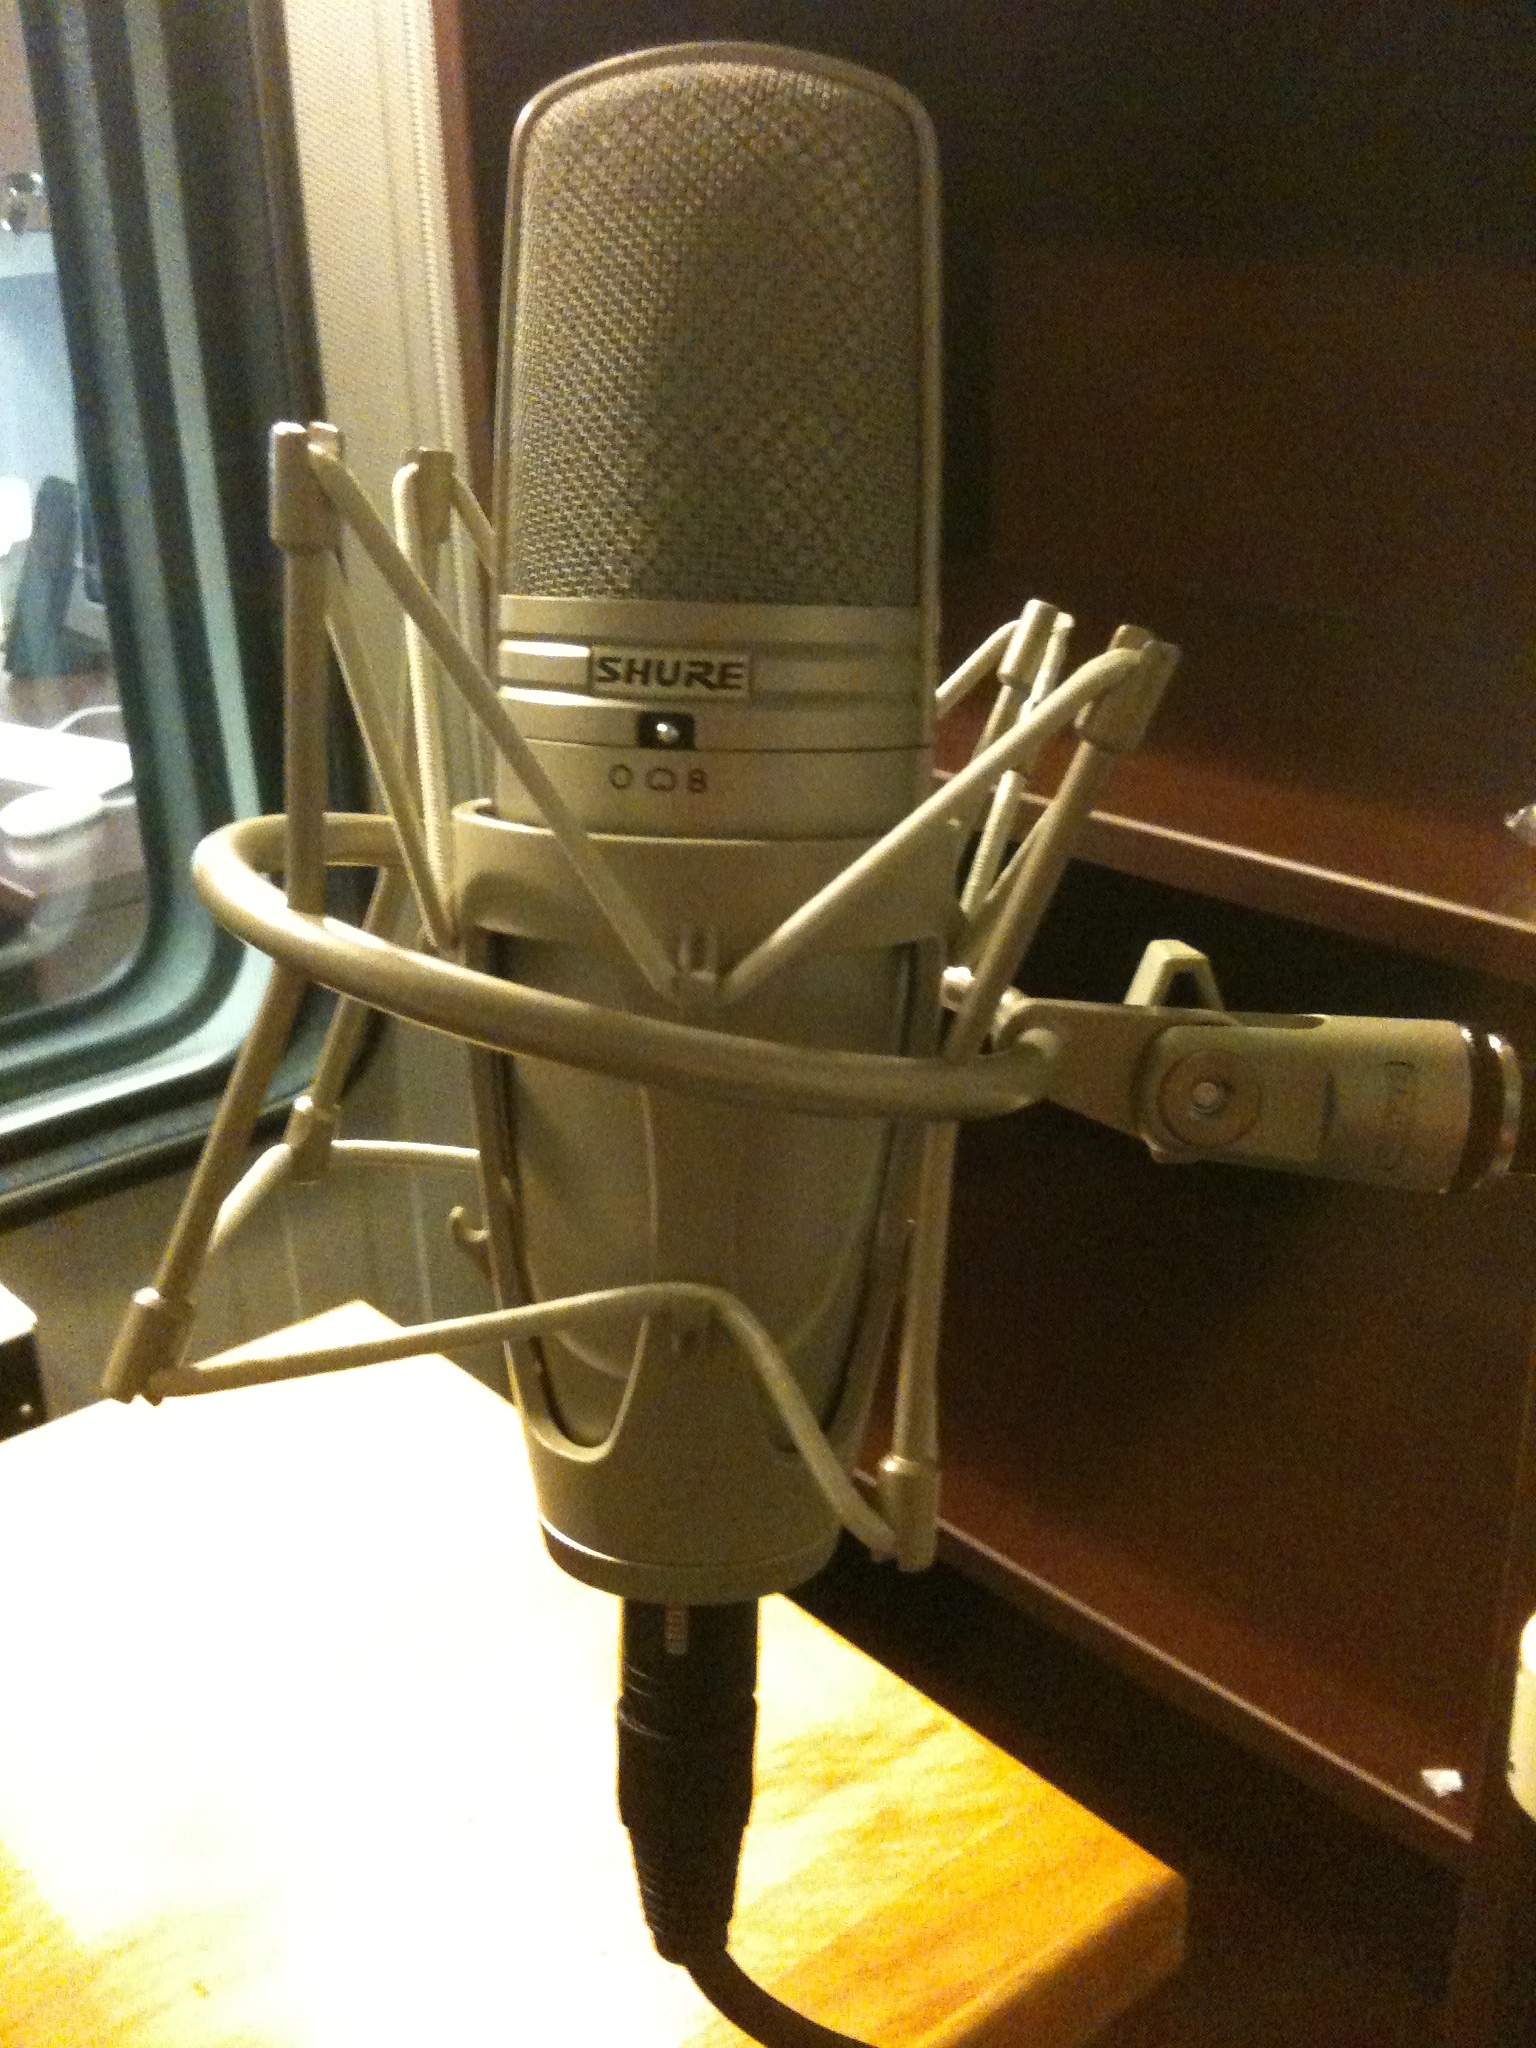
A stand-mounted microphone may be appropriate for audio-visual recordings or other situations in which a head-mounted microphone would be a distraction. A large-diaphragm condenser microphone in a shock mount may be appropriate for recording situations in which detail is very important(Note: Not available in the phonology lab).
Problems to watch out for:
- Noise from sibilants and labials: happens when the mic is in front of the mouth rather than to the side
- Proximity effect: exaggerated low frequencies when the sound source is very close to a unidirectional mic
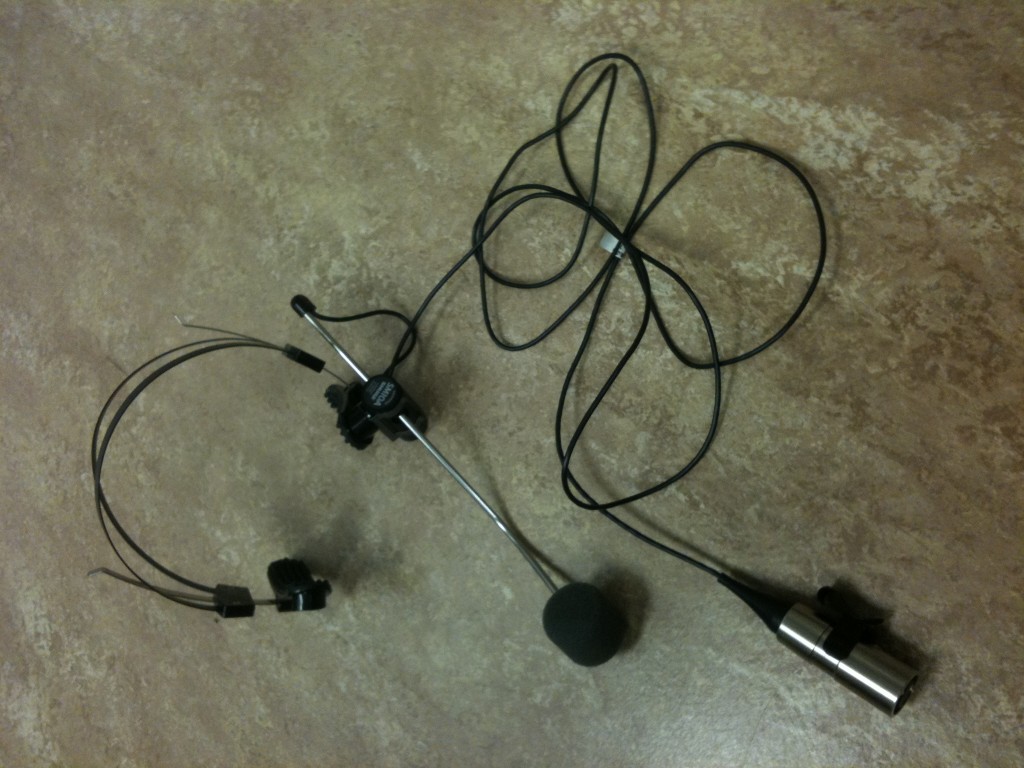
- The industry-standard Shure SM-10A head-mounted dynamic microphone

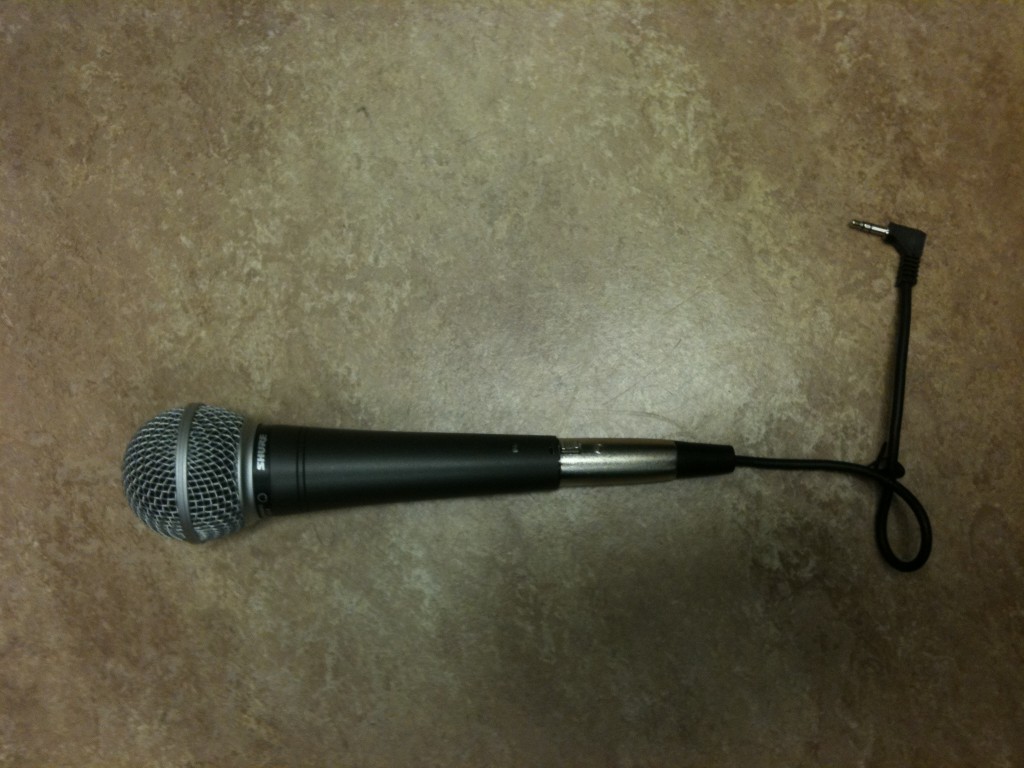
- A Shure SM48 dynamic microphone attached to a high-impedance/low-impedance transformer


- A large-diaphragm condenser microphone in a shock mount
Amplification
Amplification raises the voltage of the analog signal coming from the microphone. The “gain” control allows you to control how much the voltage is raised. Here is where you try to make your recording strong and clean, and noise is the opposite of distortion. You want to adjust gain high enough that the next stage does not have to raise it too much (making it noisy) and low enough that the signal isn’t distorted. Often a preamplifier will alert you to distortion with yellow and then red lights (whereas green indicates the safe range).
A condenser microphone requires phantom power to be provided either by a preamplifier or an additional device.
Problems to watch out for:
- Noise: happens when you use a low-quality preamplifier or amplify an unreasonably weak signal
- Distortion: happens when you over-amplify a signal
- Ground loop: low-frequency noise occurring when current is flowing between two pieces of equipment that are not grounded properly
- 60 Hz hum: AC (wall) current in North America has a frequency of 60 Hz, and when it’s leaking into your audio recording, you will hear a low frequency hum and see energy at 60 Hz on your spectrograms. Plugging everything into the same power strip can potentially eliminate this problem.
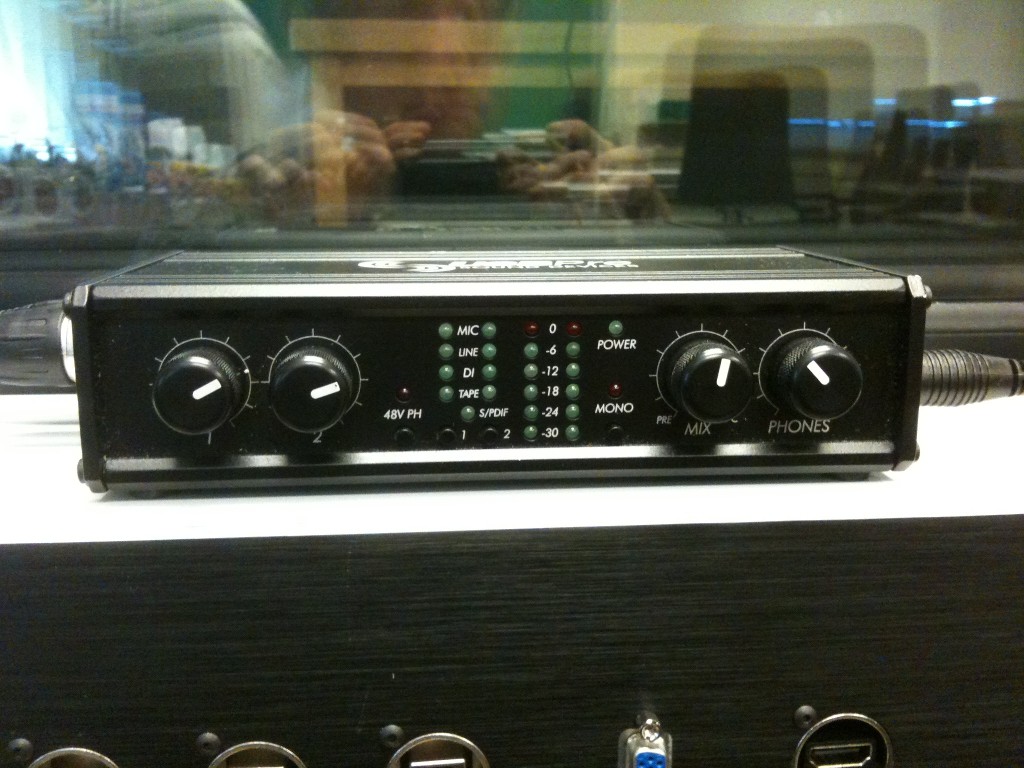
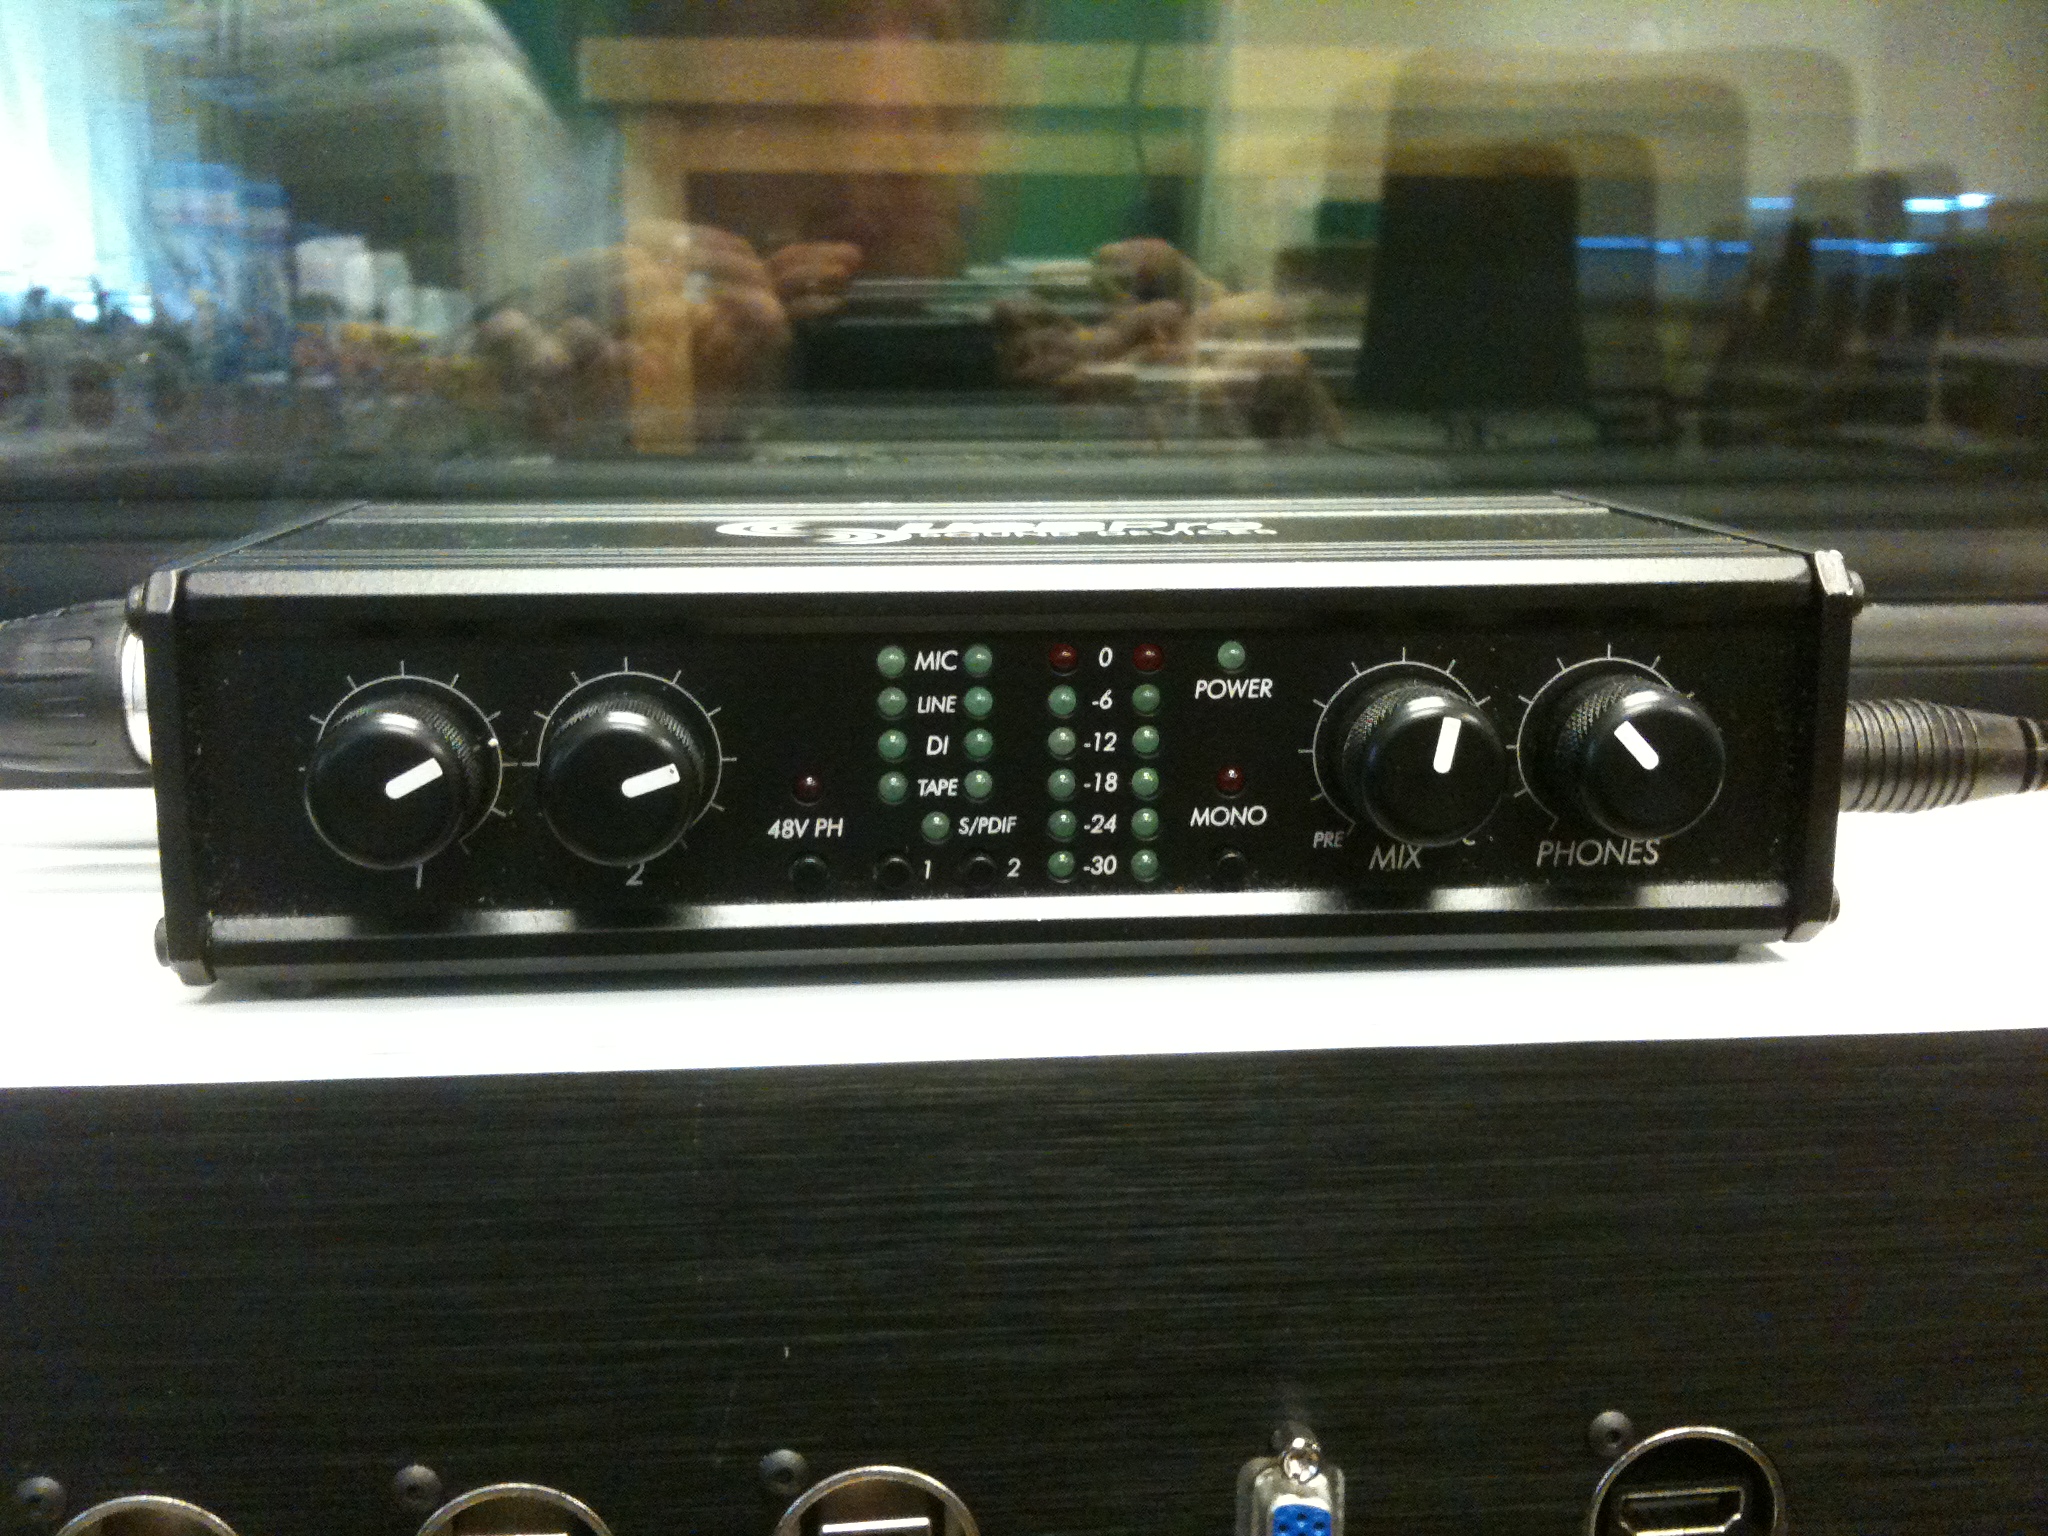
- The USBPre preamp + A/D converter (microphones connect on left, USB cable and headphones connect on right)
Analog-to-Digital (A/D) conversion
Sound waves and voltages are analog signals. The voltage produced by a microphone+preamp combination can be stored directly on magnetic tape or a phonograph record. It can be converted to numbers and stored on digital media.
Parameters for digital audio recordings:
- Mono vs. stereo: one or two audio channels. Voice recordings usually require only one (mono) channel and are preferred to a stereo recording, which will only double the file size.
- Sampling rate: how often we record the height of the wave (the voltage of the analog signal). 44.1 kHz (44,100 samples per second) is “CD quality” and is considered to be precise enough that human hearing cannot detect additional accuracy. The highest-frequency signal that can be recorded is half the sampling rate (and 22.05 kHz is a higher frequency than most humans can detect).
- Bits per sample: determines how many different “heights” of a wave are possible. A 2-bit audio recording can differentiate (22) 4 heights. 11 (highest), 10 (high), 01 (low), and 00 (lowest). A 16-bit audio recording distinguishes 65,536 (216) heights.
Recording
You can make a digital recording using Praat (New…Record mono Sound…). or you can use Audacity or many other programs that do basically the same thing. In the phonology lab, the preamplifier on the main desk can be connected to different recording devices in each of the booths by using the labeled cords, and these recordings can be made directly into the computer on the main desk.
Signal paths
Many different combinations of equipment can be used to provide the microphone, preamplifier, and A/D conversion necessary for a digital audio recording. Different arrangements have different pros and cons.
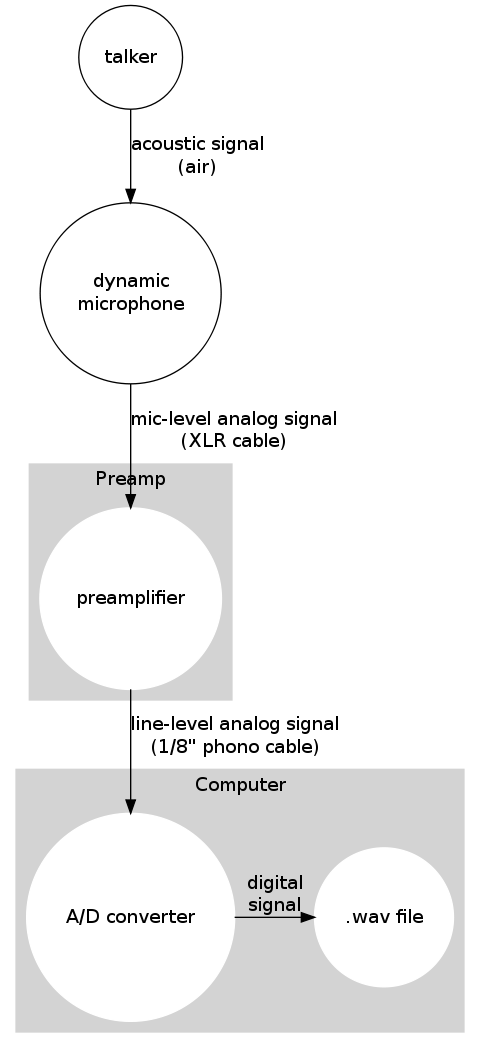
A good choice is to use a device such as the USBPre that includes a microphone preamplifier and an A/D converter.
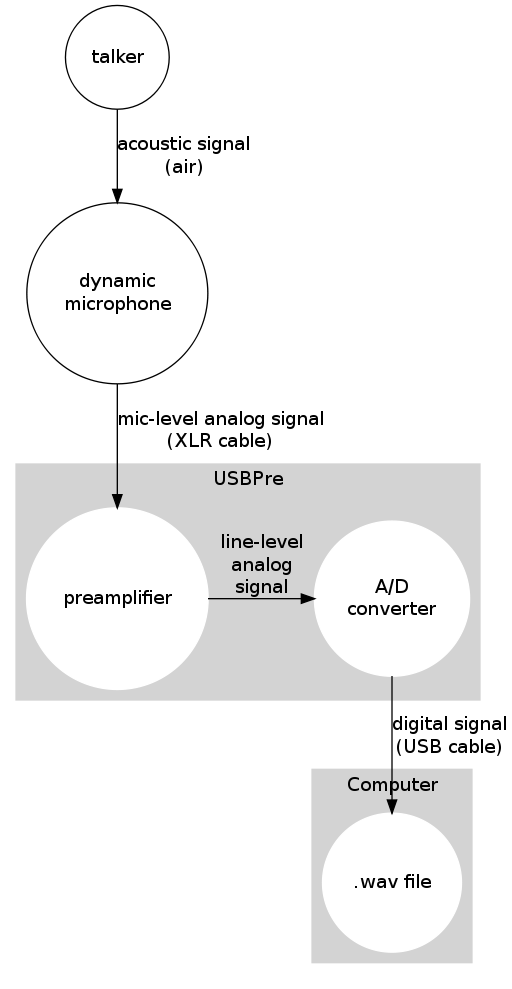
- Recording with USBPre and a dynamic microphone
A USB microphone is a microphone with a built-in preamp and A/D converter. It has all the same components as a standalone preamp+A/D converter, but the quality of the components may not be as good. This is a good choice for classroom demos that don’t require a high-quality recording.
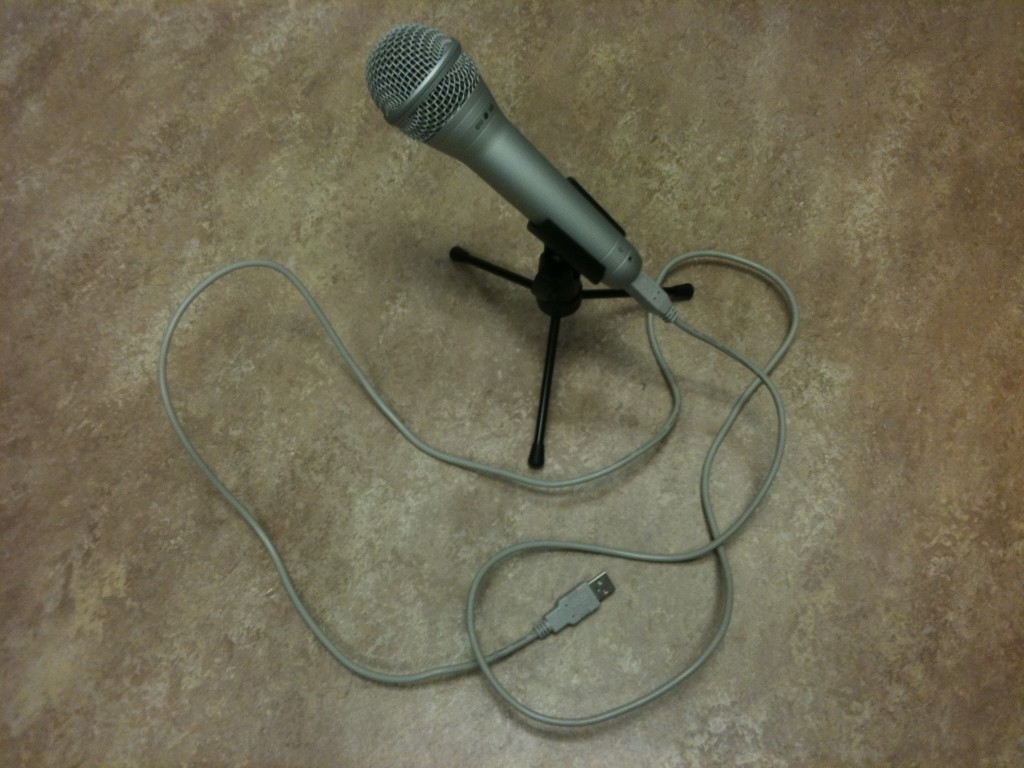
- A USB mic (dynamic) with built-in preamp and A/D converter
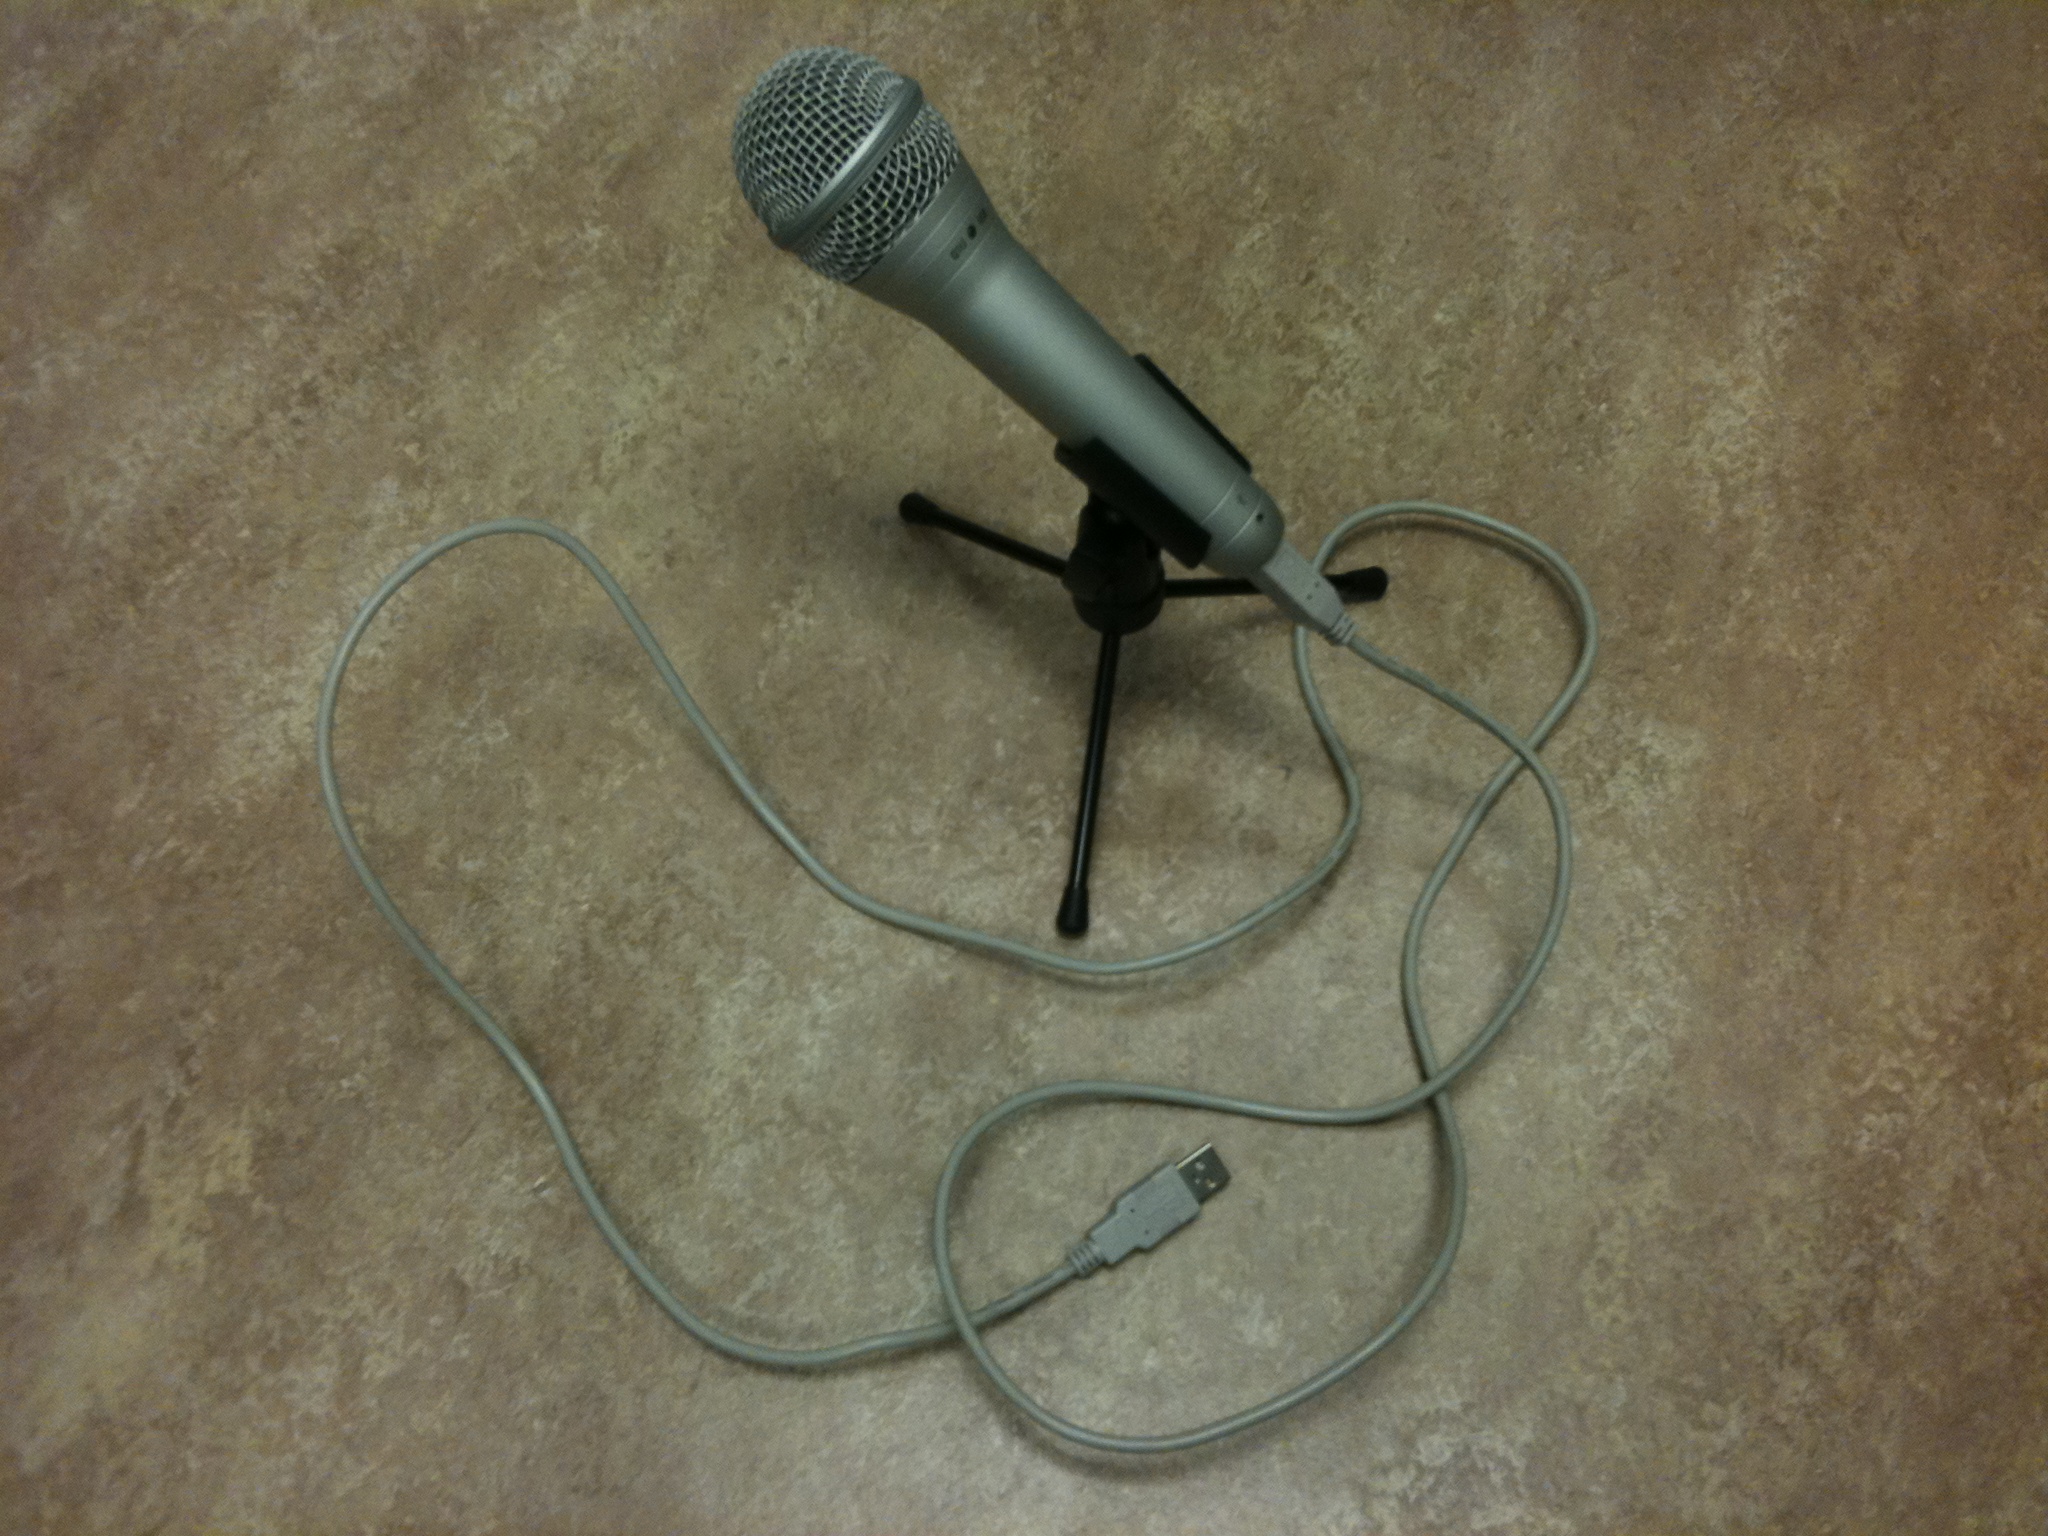
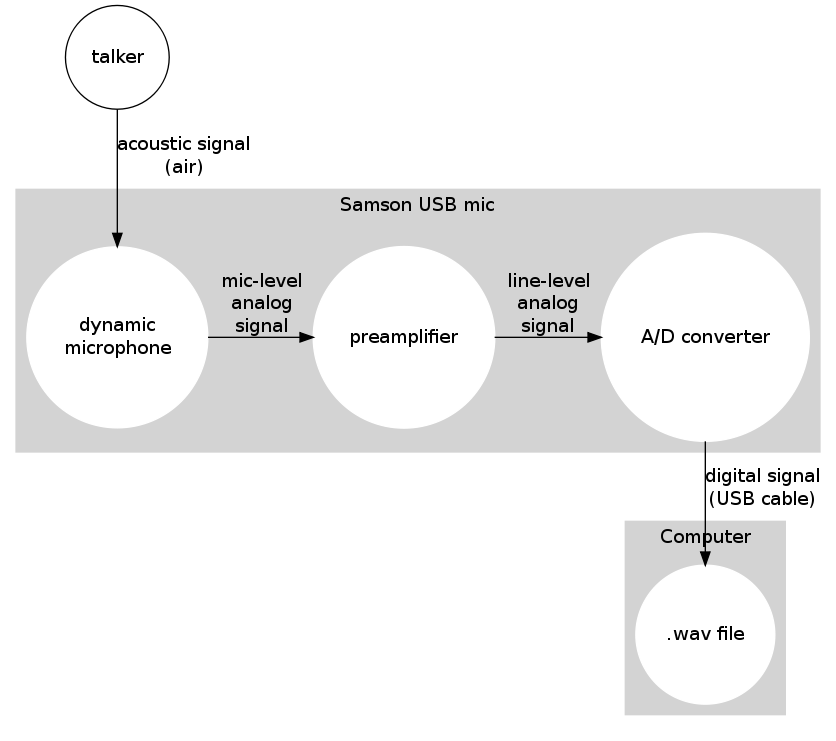
- Recording with a USB microphone
Modern computers have a built-in microphone (and a built-in preamp and A/D converter), but the quality of the components may not be good. Also, this involves putting an analog audio signal inside a computer, which is a noisy environment, and this is an easy way to pick up unwanted noises.
- Recording with a computer’s internal microphone
Some preamps (such as the commonly-seen Symetrix preamp) lack an A/D converter, so an analog signal goes into the computer, which may introduce noise.

- Recording with a standalone preamp (which doesn’t have a built-in A/D converter)
A variation on this good choice is to use a condenser microphone. This requires phantom power, which is provided by the USBPre (and also by many other preamps).
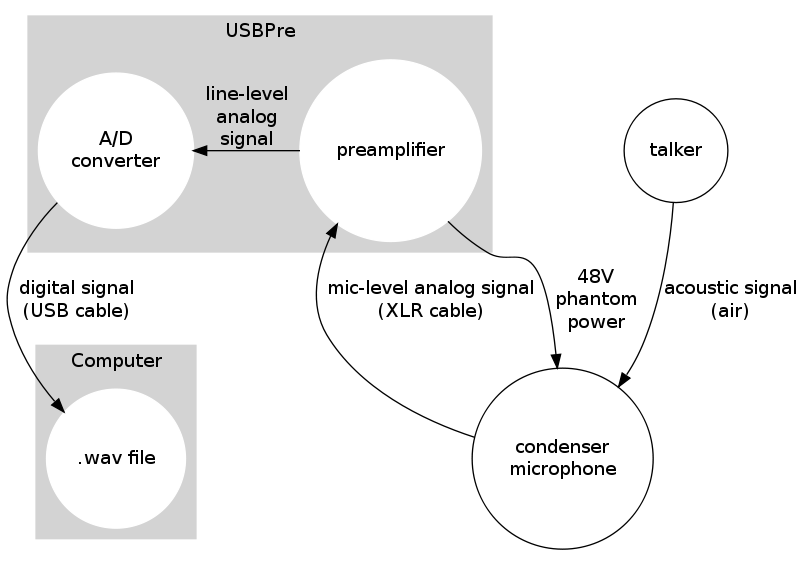
- Recording with USBPre and a condenser microphone
A Marantz recorder can be used in place of a computer and standalone preamp. It stores a record of the acoustic signal digitally, and this can be transferred to a computer by a USB cable.
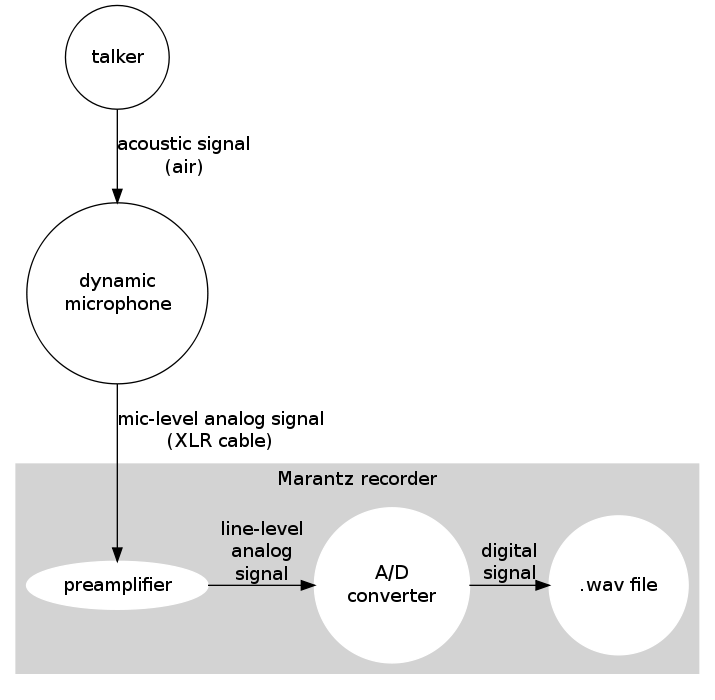
- Recording with a Marantz recorder
The preamplifiers in the Marantz PMD-660 recorders are known to be noisy. One way around this is to use a separate preamplifier. The noise problem can be reduced by making sure that the signal coming from the microphone is loud (because turning up the preamp really high is what makes the signal noisy). Larger Marantz models such as the PMD-671 have better built-in preamps.
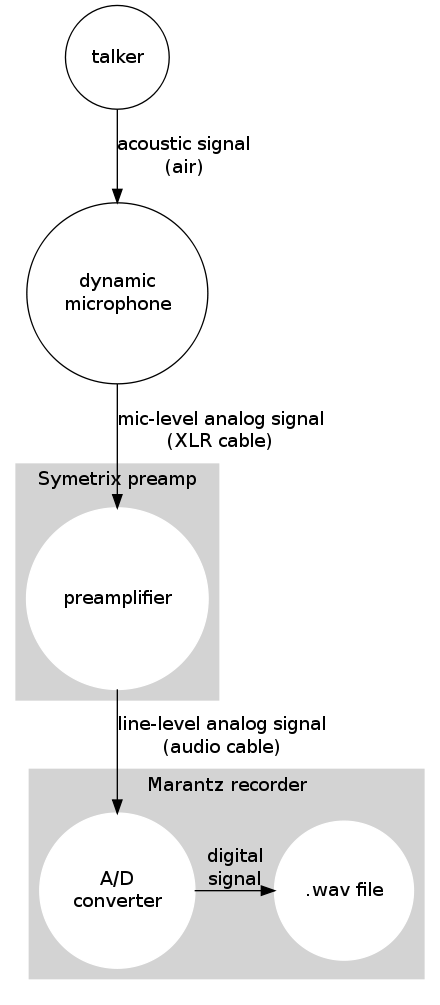
- Recording with a Marantz PMD-660 recorder and a separate preamplifier
- Forced Alignment