

Now we’re going to walk through how to use PsychoPy, from installation to experiment with descriptions of the most important features. If your specific type of task isn’t listed in the examples, experiment with the builder yourself and see if you can figure out how to make it work for you! Also consider referencing the PsychoPy manual and various message boards and forums for answers to your questions.
1. Installation
Throughout this tutorial we’ll be giving examples in a Windows environment, but processes for Linux or Mac environments are comparable. The first step is to choose your installation. We recommend choosing the Standalone option, as this includes all the relevant dependencies and is the most hassle-free option. Once installed, open up PsychoPy to begin a new experiment. On windows, this will open the PsychoPy builder window as well as a command line window running python which you need to leave open. Then, save your blank experiment in a folder. PsychoPy experiment files will end in the extension “.psyexp”.
2. Builder and menu options
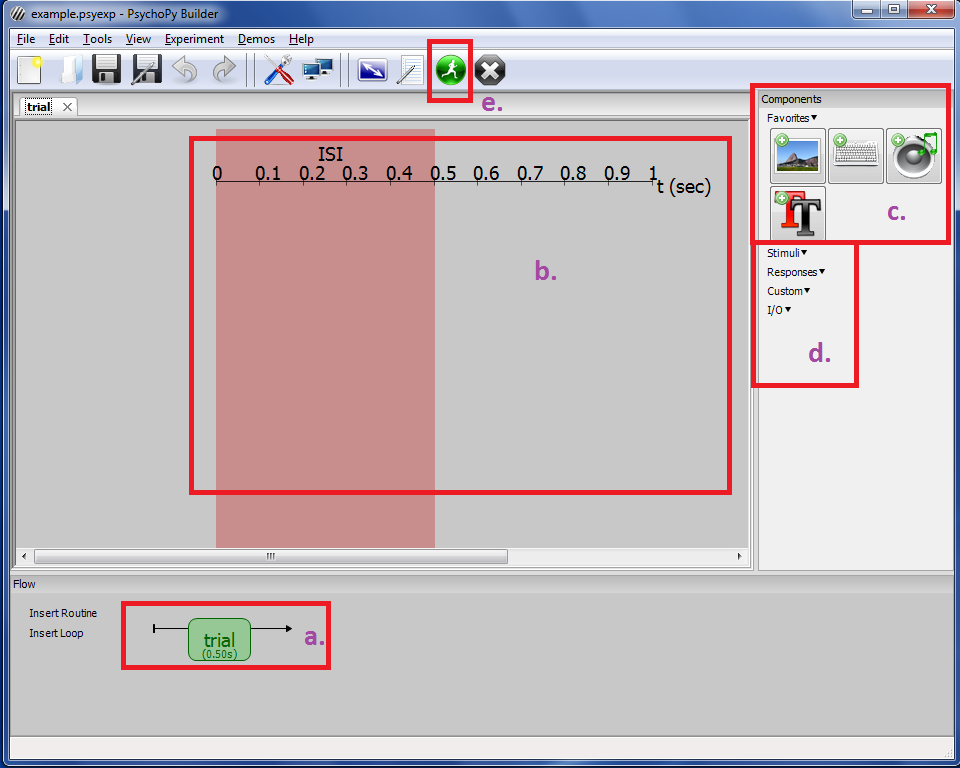
Figure 1 – Example of PsychoPy Builder Window
The above Figure 1 shows the basic layout of the Builder View. PsychoPy experiments are built together by assembling Routines or modules which each have a certain function. One way of thinking of these routines are as individual slides in a slideshow. The Flow is the bottom part of the builder window (a.) and shows the order of all your routines. In the above example there is only one routine called “trial”.
The main window (b.) shows the content of a single routine. Right now our routine “trial” is empty. If we had more than one routine, we could change which routine we were editing in the main window by clicking on it in the flow or clicking its tab in the upper left corner.
Routines are made up of components: either input (mouse clicks, button box presses, microphone recordings) or output (text on the screen, audio stimuli, graphics). The components you use most often will be shown at the top portion of the components menu (c.) while those used less often are shown in the menus below (d.). You can control almost everything about components, but right now we’ll focus on duration and types.
3. Adding stimuli
Let’s try adding some simple stimuli components to our experiment, say for the instructions at the beginning of the experiment. First, remove the trial routine and add a new routine called “instr1” by clicking Insert Routine –> New and then click where in the flow it should go (only one choice at the moment). Then, click on the text stimuli component to add it to the routine. We can change the orientation, color, size, position, font, and duration of the text, but for now let’s just change the Stop – “duration (s)” from 1 to 4 and the Text from the default to “You will now begin an experiment. These are the instructions.”
Say we also want a dot to show on the screen after the instructions so the participants know another screen is coming up. To do this, insert a Polygon stimuli component. Let’s change the vertices to 90, and the size to [0.1, 0.1]. Your builder window should look like the figure below.
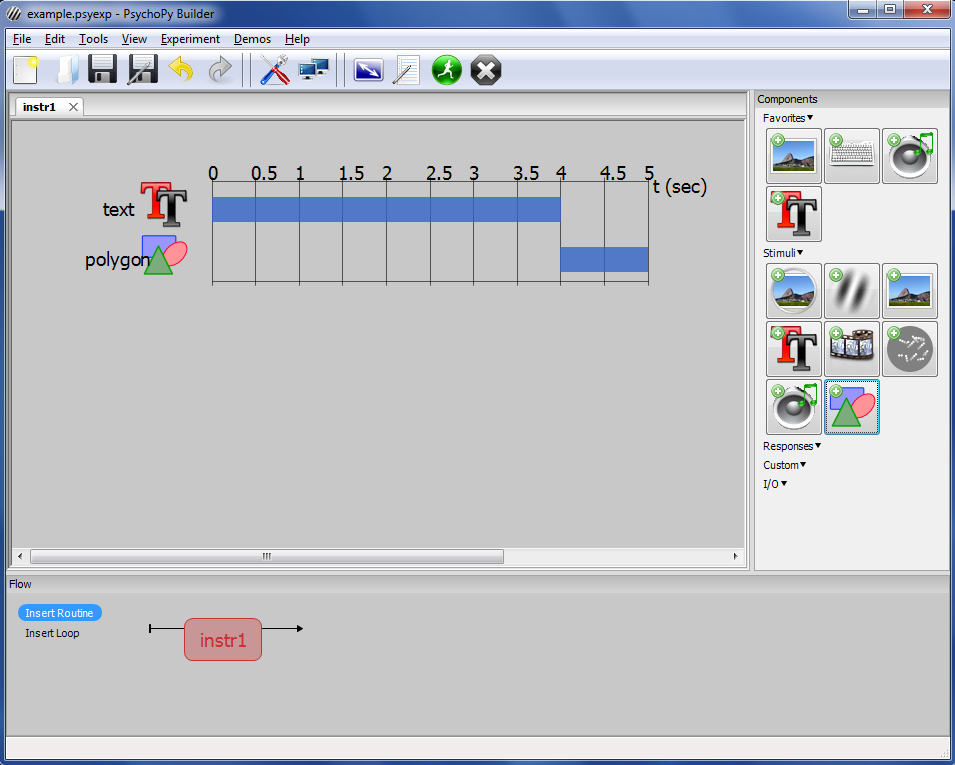
Figure 2 – Experiment Build Step 1
Before we run the experiment, think for a moment: can you predict what will show on the screen? To test your predictions, press the green “Run” icon (e.) at the top, then enter a random number or string to be used as the participant label.
4. Adding responses
What if you want a certain routine to end only when someone presses a button to continue? To do this, first create a new routine called “instr2” to the right of “instr1”. You’ll notice that the label for “instr1” in the flow has now changed to green and shows the duration of the routine (5.00s). Routine with a set duration like “instr1” will show are labelled as green, while routines without a set duration are shown in red.
First, add a text component to the routine “instr2” and change the text to “When you are ready to proceed, press the space bar”. In order to make the text component not end until the participant presses space bar, remove the value from Stop – duration (s) and leave the value blank. This will cause the component to run until the routine itself is stopped.
Then, add a keyboard input component starting at 1 and with a blank duration as well. This means that PsychoPy will only recognize keyboard presses after 1 second, but until the routine is stopped. In order to have the keyboard press end the routine, make sure Force end of routine is checked. Finally, change the Allowed keys $ field to just ‘space’. Your experiment should look like the figure below. Run the experiment and test it out!
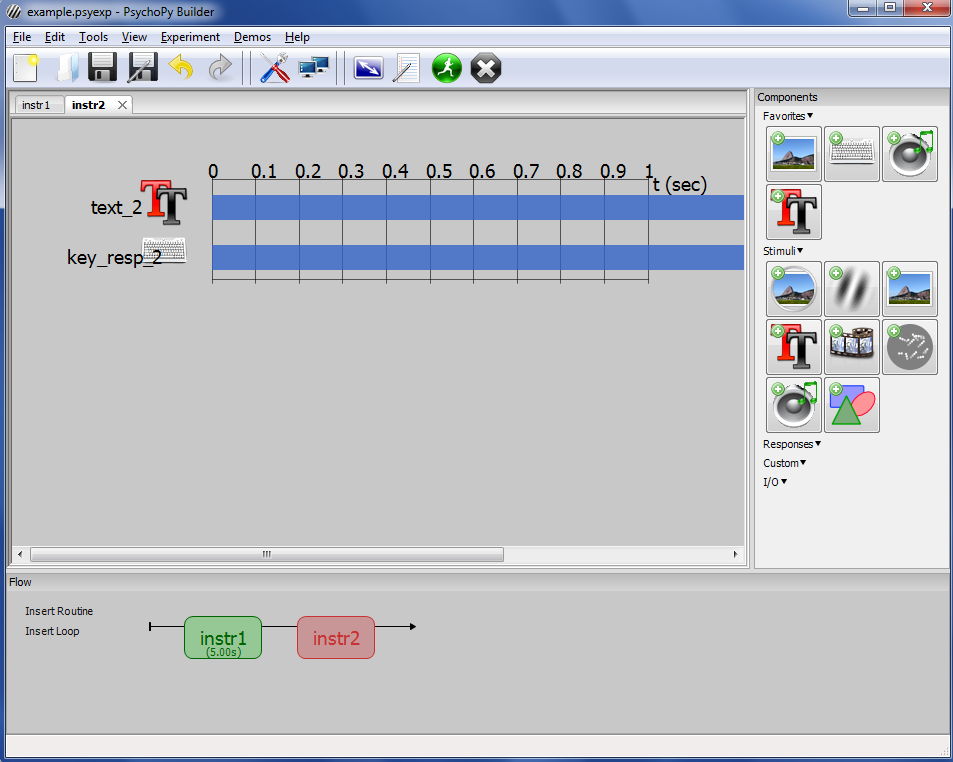
Figure 3 – Experiment Build Step 2
In the next section, we’ll discuss how to add loops and trials to your experiment by building a lexical decision task.
Back to (Perception experiments)
Go to (2. PsychoPy Tutorial: Loops and Trials – Lexical Decision Task)