

Next we’ll discuss using loops and trials with a practical example by making a lexical decision task. In a lexical decision task, participants are often presented written word stimuli and asked to determine if they are real words or fake words. In most cases, the task of reacting to the fake words is actually a ruse, and what the investigator is interested in is actually the differences in response time among the real world stimuli.
For the current example, let’s just imagine that we’re only interested in the difference between reaction time for the real and fake words. Let’s also imagine that we only have 10 test words: 5 real (blue, green, yellow, red, orange) and 5 fake (thorpt, rairn, coan, flatch, meeg). In theory we could randomize the list ourselves and then create individual routines for each word, but that would quickly become tedious and not easily replicable. Instead, we’ll utilize loops.
First, we’ll make the baseline routine which we’ll call “trial”. This is the template that each of the individual repetitions will be made from. In the trial routine, add a text component with a blank stop duration. The important step in this process is to add “$word” to the text field and change the “constant” in the drop-down window beside the text field to “set every repeat”. Strings beginning with a “$” are variables and since we’ve changed “constant” to “set every repeat”, the variable will be updated every repeat. We’ll define the “$word” variable later.
Next, we’ll add a Cedrus Button Box component to measure the response time (Make sure you’ve followed the instructions for adding the Button Box extension if you’re running it for the first time!). Change Stop – duration (s) field to blank and change the Allowed keys $ field to “2,4”. On our button boxes, 2 references the red button and 4 references the green button. Make sure that “Force end of routine” is checked. We also want to store information about whether or not the participant responded correctly. To do this, check the “Store correct” box and add “$thisTrial.correctAns” to the Correct Answer $ field.
NOTE: If you don’t have access to the button boxes in the lab, you can use a keyboard or mouse component instead for testing purposes. However, you cannot capture reliable reaction time data with these inputs because of their inherent latency. Make sure to use a button box for your actual experiment!
Right now our PsychoPy experiment has no information about what to use when filling the variables, so we’ll have to give it that information. Open an excel document (or csv formatted text file) and make two columns: word and correctAns. For each of the values of word, we’ll pick the corresponding correctAns: real words = 4 and fake words = 2. Save this file as “conditions”. Since we’re randomizing the words, the order of the rows does not matter. ((Tip! — You can include other columns and PsychoPy will record this data with each repetition in the output. This allows you to store various meta-data that will be useful in the analysis but which is not used in the stimulus))
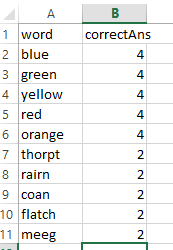
Figure 4 – Conditions File for PsychoPy Loop
Now, we’ll give PsychoPy the information stored in the conditions files. Click “Insert Loop” then click on the left and right sides of the “trial” routine. Change nReps $ to 1 and the click the Browse buttons to choose the conditions file. Your Builder window should now look like the below figure. Click run to test the output.
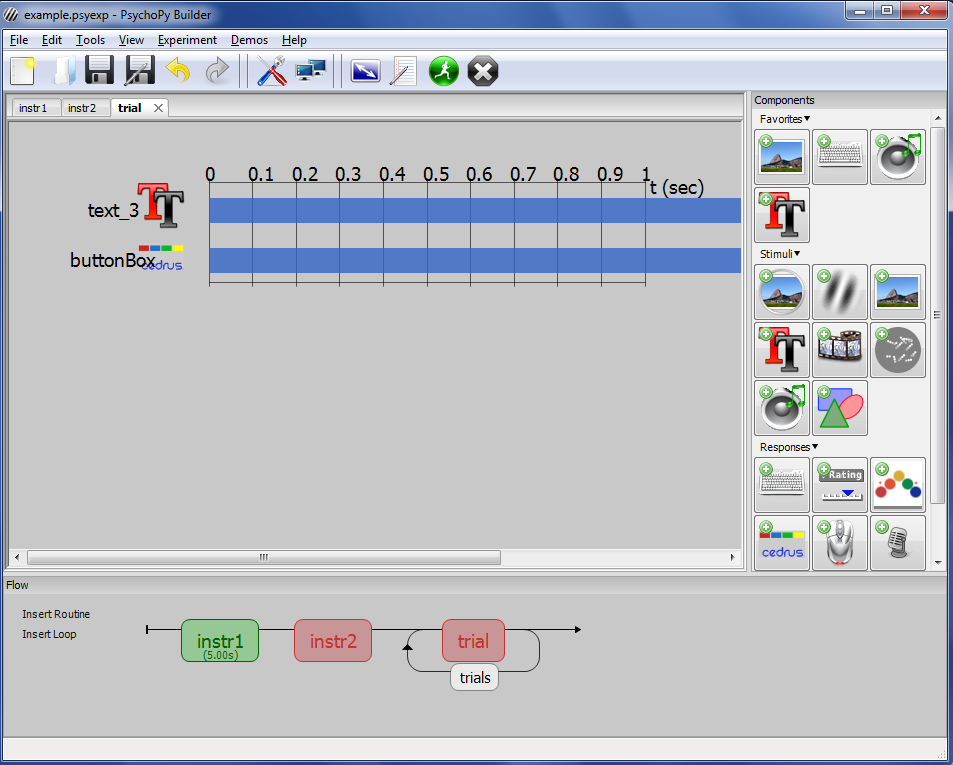
Figure 4 – PsychoPy Tutorial Step 3: Loops
After successfully running the experiment, PsychoPy will have created a folder called “data” wherever the experiment is located. The excel document with your participant label should look something like the following figure.
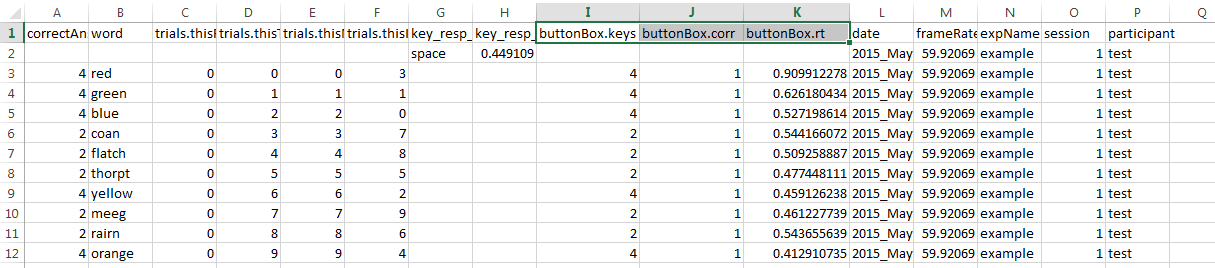
Figure 5 – PsychoPy Output Example
Each row corresponds to a repetition of the trial routine. What we’re most interested in are the columns I-K which show the key pressed (buttonBox.keys), whether it was correct or not (1=yes, 0=no) compared to the variable correctAns, and the response time in seconds (buttonBox.rt).
The next tutorial will introduce audio stimuli and recording by demoing a shadowing task.
Back to (1. PsychoPy tutorial: getting acquainted with the builder)
Go to (3. PsychoPy Tutorial: Working with audio – Shadowing Task)