

Often times in a psycholinguistic experiment you’ll want to give real time feedback on a participant’s answers. While PsychoPy doesn’t offer direct support for this feature, we can hack conditional branching with a method presented by Mike Wall on his blog.
To learn how this works, let’s imagine that we’d like our participants to see a red or blue square and then press either ‘F’ for red and ‘J’ for blue. We’d also like to give immediate feedback about whether or not they were correct.
First, let’s construct a normal instructions routine as in previous examples. Then, create the “Task” routine which will cover the presentation and participant responses. In the Task routine, create a Polygon component starting at 0 and with an endless duration. Click the advanced tab and change “Fill Color” to $colorVar and choose “set every repeat”. Now, add a keyboard response component, changing the start time to 0.25 (or whichever you’d prefer), “Allowed Keys” to ‘f’, ‘j’ (note the quotes), checking “Store correct”, and changing “Correct answer” to $correctAns. We’ll make the conditions file later.
Next we’ll add three routines directly after the “Task” Routine. It should look like the below figure.
- “blockSelect” – leave this one blank for now
- “correct” – the text/images you’d like the participant to see after a correct response
- “incorrect” – the text/images for an incorrect response.
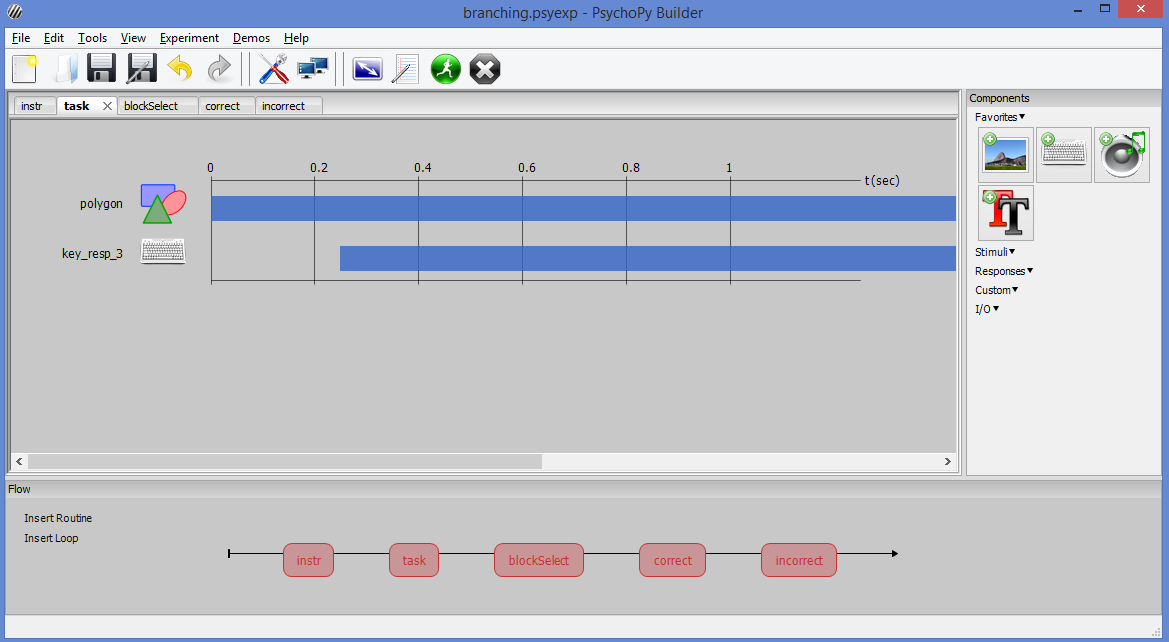
Figure 7 – Branching Step 1
Now, make individual loops for the correct and the incorrect routines. These loops will have no conditions files attached to them, but will have number of reps set to the variable nRepsCorr or nRepsIncorr as in the figure below.
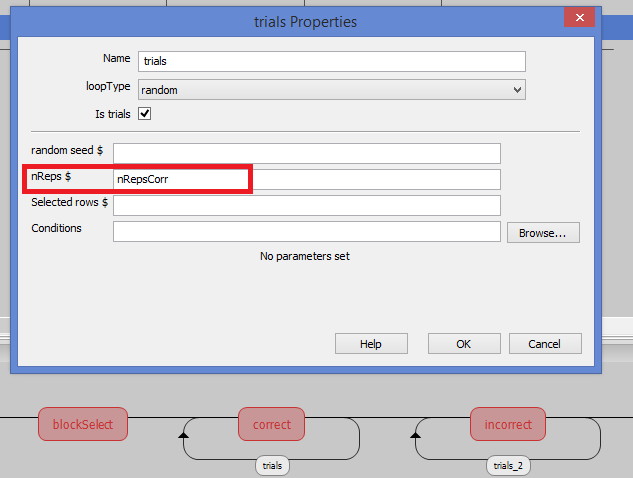
Figure 8 – Branching Step 2
Next we’ll go to the “blockSelect” routine and add a “Code” component from under the “Custom” section. In the “Begin Experiment” and “Begin Routine” sections of the code component, add the following lines. NOTE: You’ll have to change “key_resp_3” in “key_resp_3.corr” to whatever the name of the participant’s choosing component (key_resp2, buttonBox1, etc.) is in your experiment.
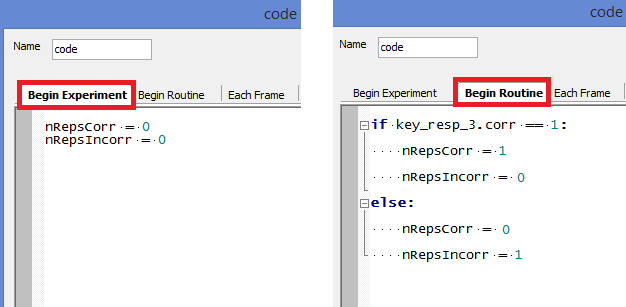
Figure 9 – Branching Step 3
If you’re familiar with coding, you’ll realize that the if statement in the “Begin Routine” section first tests whether the participant was correct and if so, sets the the number of reps for the “Incorrect” routine to be zero, essentially skipping it. If the participant’s response was incorrect, it sets nRepsCorr to 0 and skips the “Correct” routine.
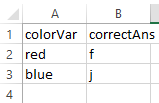
Figure 9 – Branching Step 4
Finally, we’ll create the conditions file with the colorVar and correctAns as in the above figure. Using this conditions file, make one large loop from before the “Task” routine until after the “incorrect” routine as in the figure below. Test out your experiment and then begin altering it for your own purposes!

Figure 11 – Branching Final Step
Back to (3. PsychoPy Tutorial: Working with audio – Shadowing Task)
Go to (5. PsychoPy Tutorial: Artificial Grammar Learning)